What
Outlook is a paid organizer program with email client functionality. Usually this program comes with MS Office, but you can download it separately on the official website. As you understand, in the CIS, many people download the hacked version on the torrent...
How to set up to receive, store and send mail?
To get started, you will need the following settings:
SMTP server - for example smtp.mysite.com
POP3 server - e.g. mail.mysite.com
Username - for example boss@mysite.com
The password - is also the password in Africa.
Let us remind you once again that the username and password are set by you when creating a mailbox (in the hosting control panel). POP3 and SMTP servers can be obtained from the hosting provider, or you can check the email with the settings that comes after you order hosting.
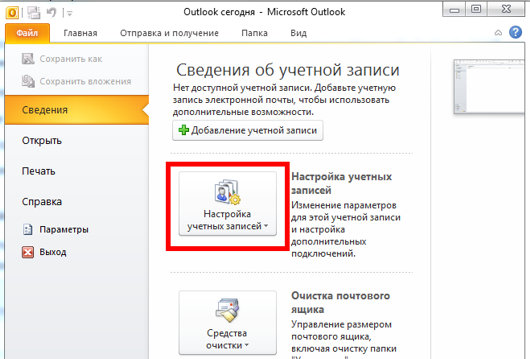
- Open The Bat and go to "File" -> "Details" -> "Account Settings".
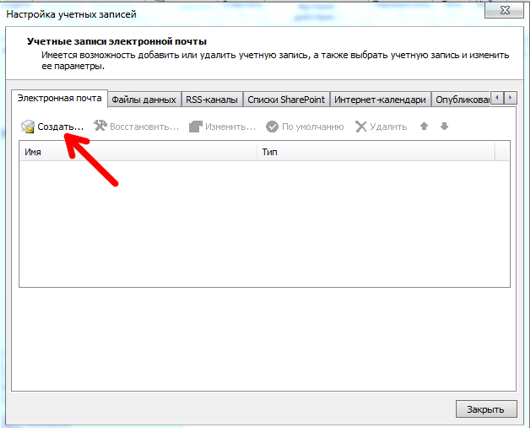
2. On the "E-mail" tab, click "Create".
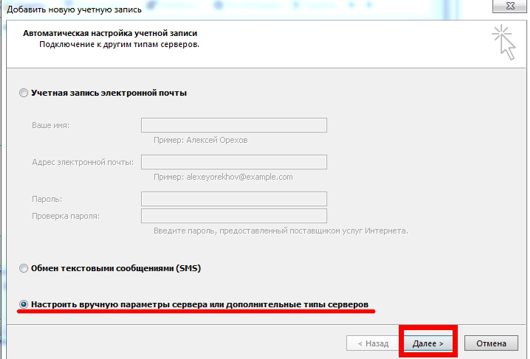
3. "Choose to manually configure the server settings ...".
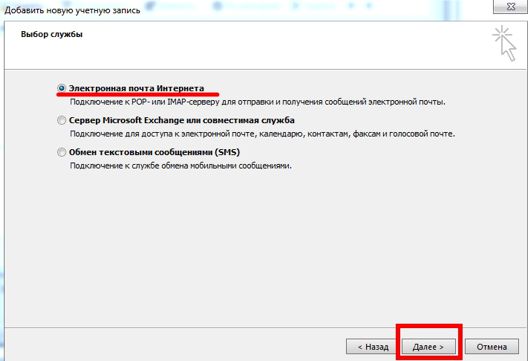
4. After that, check "Internet E-mail".
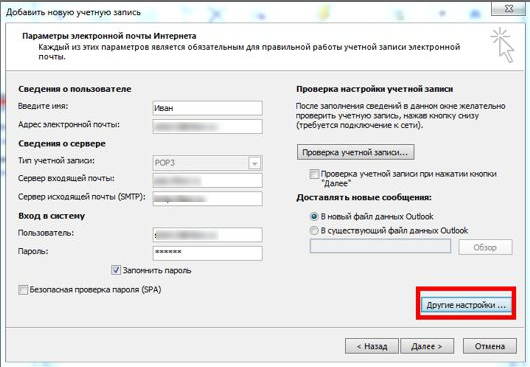
5. In the next step, enter your name, email address, and account type (we recommend POP3, but if in doubt, read more details). Outgoing and incoming mail servers, username and password (learned at the beginning of the article). You can disable account verification if you wish. "Deliver new messages" we recommend selecting "To a new Outlook data file". Then click "More Settings".
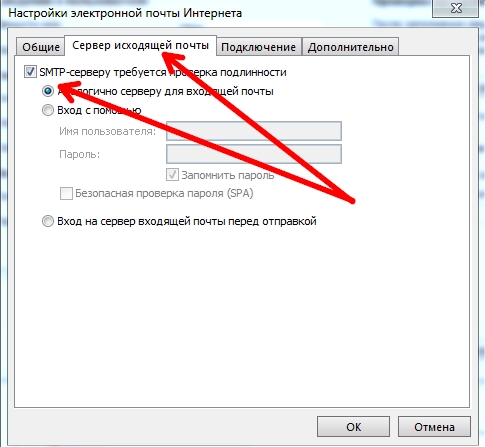
6. Select the "Outgoing mail server" tab. And put the checkmarks, similar to the picture.
7. Везде жмем "Ok" и "Далее". И в конце-концов Ваш новый ящик будет в левой колонке.
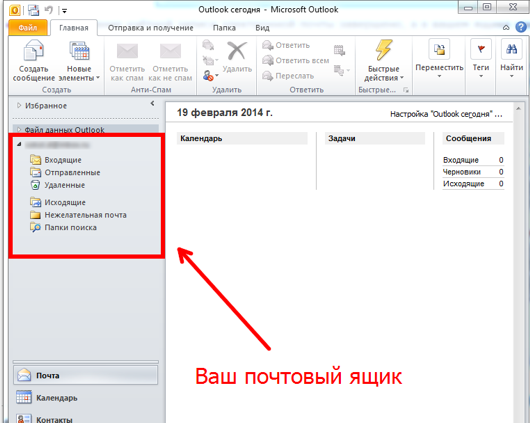
If you did everything correctly, then the box will be created, and you will easily figure out how to manage it. If you have any difficulties or errors, then write them in the comments, and we will try to answer you by email.
Bad recipient address syntax error
This error usually occurs because validation of the sender's e-mail address is enabled. To fix this, click "Tools" -> "Options" -> "Email Options" -> "Advanced Email Options" and uncheck "Automatically check names".

