
Spam filters in cPanel: how to turn on and tune SpamAssassin
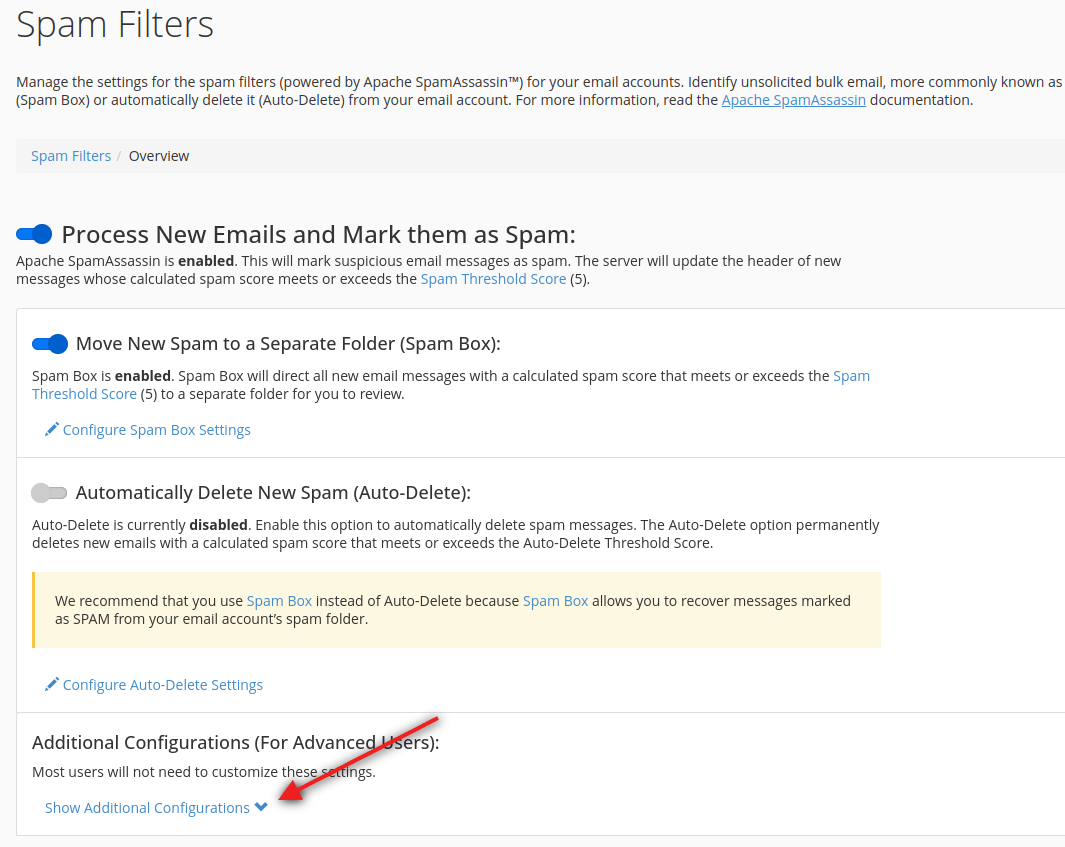
PrintcPanel filters incoming spam with Apache SpamAssassin. Open Email, then Spam Filters, switch on Process New Emails and Mark them as Spam and, if you want spam out of the inbox, Move New Spam to a Separate Folder (Spam Box). The settings apply to every mailbox of the hosting account.
How SpamAssassin decides
Each incoming message gets points for suspicious signs: a sender on a known spam list, missing SPF or DKIM, typical spam phrases, odd formatting. When the total reaches the threshold score, the message is marked as spam. A lower threshold catches more spam but also more good mail; a higher one lets more spam through.
Step 1: open Spam Filters
Log in to cPanel and, in the Email section, click Spam Filters.
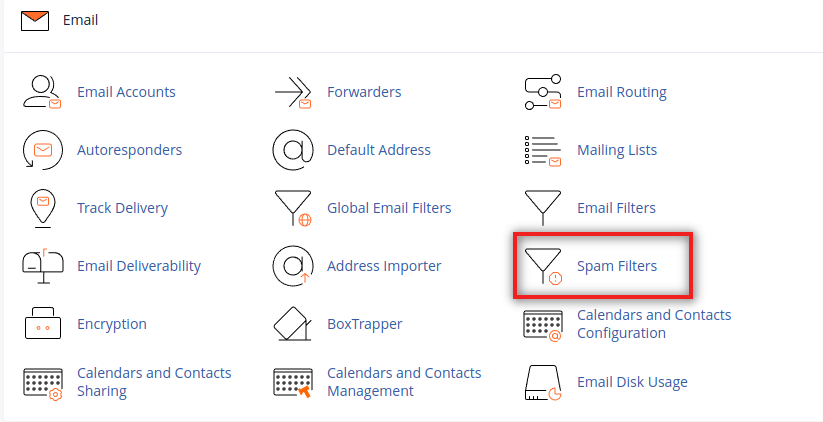
Step 2: turn on marking
Switch on Process New Emails and Mark them as Spam. A green confirmation appears. From now on, messages above the threshold get a spam mark in their headers and subject, which mail programs and filters can use.
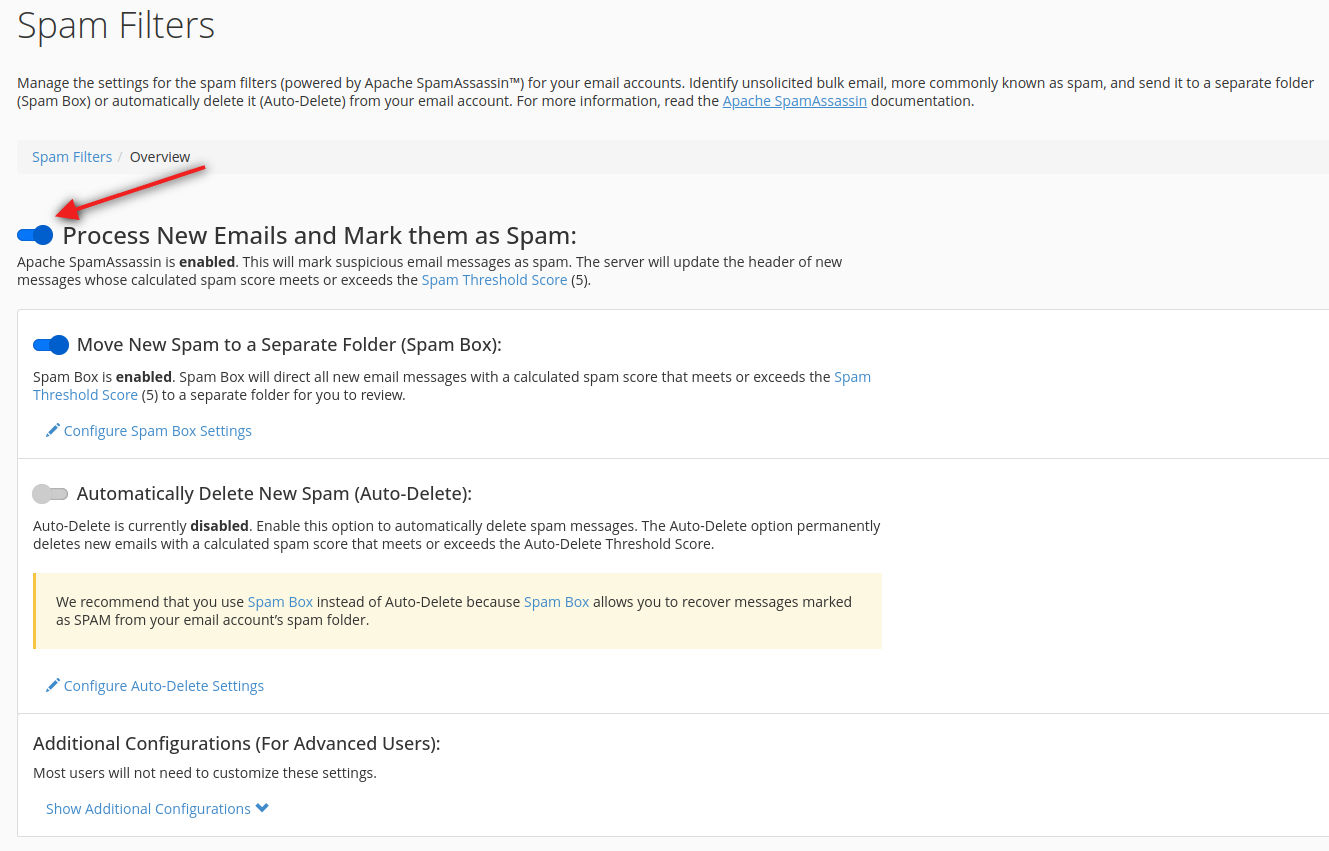
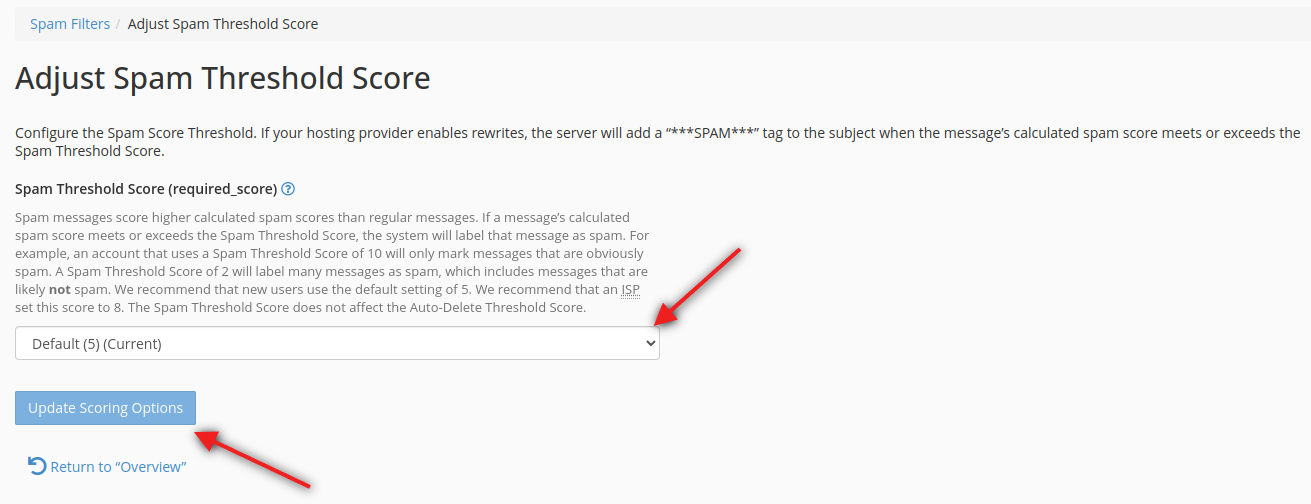
Step 3: choose the threshold
Under the same option, open the threshold setting. The scale runs from 1 to 10:
- 5 is the default and works well for most mailboxes;
- 4 or 3 if a lot of spam still gets through; lower it one step at a time and watch for good mail being caught;
- 1 or 2 is too strict for business mail: invoices and replies from clients will be marked;
- 6 to 10 only if many legitimate messages are marked, for example newsletters you subscribed to.
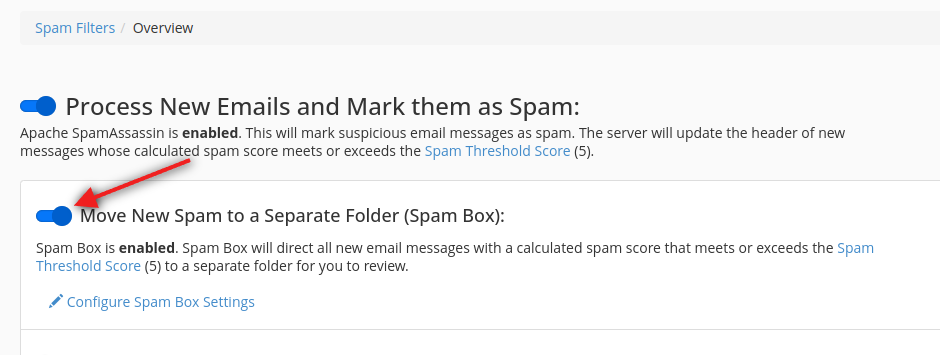
Step 4: send spam to its own folder
Switch on Move New Spam to a Separate Folder (Spam Box). Marked messages then go to a folder named spam in each mailbox instead of the inbox. You see it in webmail; in Outlook or on a phone you may need to subscribe to the folder before it appears. Look through it once or twice a week and delete it regularly, because it counts towards the mailbox quota.
Step 5: always allow or always block senders
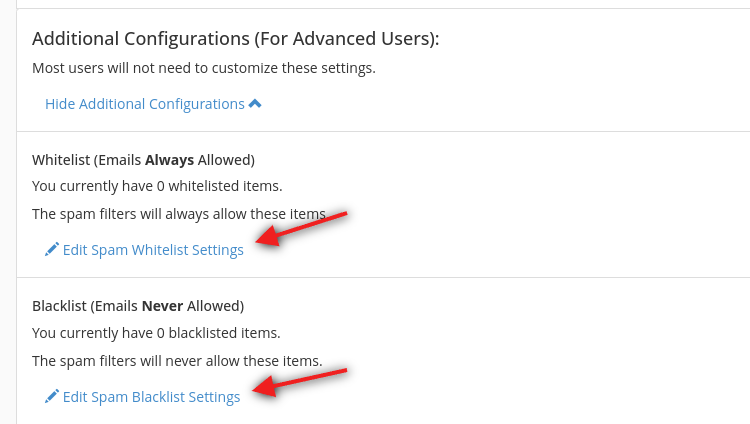
Click Show Additional Configurations to see the lists:
- Whitelist (emails always allowed): partners and services whose mail must never be marked;
- Blacklist (emails never allowed): senders you never want to hear from.
Open the list, click Add A New Item, enter one address per line and click Update. A star covers a whole domain: *@partner.md allows every address of that domain.
Automatic deletion: leave it off
Automatically Delete New Spam (Auto-Delete) erases marked messages before anyone sees them. One wrongly marked order or invoice is then lost for good. If you use it at all, set its score high (for example 10) and keep the Spam Box for everything below.
Common mistakes
- Whitelisting a whole free mail service, such as
*@gmail.com. Spammers use those services too, so the filter stops working for a large share of mail. - Never opening the spam folder. A real message sometimes lands there; check it before you empty it.
- Forwarding unfiltered mail to an outside address. Turn the filters on first, as explained in email forwarding.
Why was a good message marked?
Open the message source in webmail and look for the X-Spam-Status header. It shows the score and the names of the tests that added points. Often the sender's domain has no SPF or DKIM; then the sender has to fix it, and in the meantime you can add the address to the whitelist.
Is the problem the other way round?
These filters handle mail you receive. If your own messages land in the Spam folder of your recipients, read Recipients find your emails in Spam and SPF and DMARC step by step. If you receive a notice that your IP is on a blacklist, see Spam notice or blacklisted IP.
