
Moving a website to TopHost: upload it in cPanel or let support migrate it
PrintSwitching hosts sounds risky, but done in the right order your visitors never notice. There are two ways to bring an existing site to TopHost hosting: our support team copies it from your current host, or you upload it yourself in cPanel (files into the domain's folder, the database into a new database, then connect the two). Either way the old site keeps running, and visitors only reach the TopHost server after you have checked the copy and changed DNS.
Which way suits you
| Option | When it fits | What you do |
|---|---|---|
| Migration by support | You have access to your current host (cPanel, another panel or FTP) and would rather not handle files and databases | Send the access details in a ticket, check the copy, change DNS |
| Upload it yourself in cPanel | You already have an archive of the files and a database export, or you want to control every step | Follow the steps in the second part of this article |
Option 1. TopHost moves the site for you
What we need from you
| Your current host has | Send us |
|---|---|
| cPanel | Your cPanel login. This is the easiest case: files, databases and usually the email accounts move together |
| A different control panel | Access to that panel, so we can pack the whole site into an archive |
| FTP only | Your FTP login plus database access (for example through phpMyAdmin) |
Before you start
- Turn off two-factor authentication at the old host for now, otherwise we cannot sign in.
- Write down any special DNS records you rely on: Google verifications, external email services, subdomains that point elsewhere.
- Check when the old hosting and the domain expire, so neither runs out in the middle of the move.
The steps
- Order a hosting plan at tophost.md and pay the invoice.
- Once it is active, open a ticket asking for a migration and naming the domain.
- Put the access details for your current host in that same ticket. Do not send them through messengers or social networks.
- When we confirm the copy is done, check the website on the new server and only then point the domain to TopHost, as described further down under testing and DNS.
How long it takes depends on how much there is to copy. A small website moves quickly; one with many gigabytes of files or email needs more time. The current terms of the migration service are on tophost.md, or ask support before you order.
Option 2. Upload the site yourself in cPanel
What to have ready
- an archive of the site files, preferably
.zip; - an export of the database, a
.sqlfile or its compressed form (.sql.gz,.sql.zip), if the site uses one; - the name of the configuration file of your CMS:
wp-config.phpfor WordPress,configuration.phpfor Joomla,config.phpandadmin/config.phpfor OpenCart.
While you work, avoid changing the old site (new orders, new posts): anything added there after the export will not reach the new server.
Step 1. Open the domain's folder
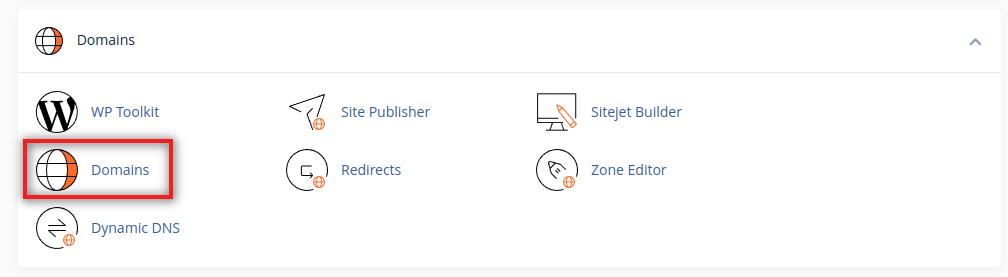
- In cPanel, open the Domains section and click Domains. The table shows every domain of the account with its Document Root, the folder from which it is served.
- Click the folder link next to your domain. File Manager opens directly in that folder:
public_htmlfor the main domain, a folder of its own for an addon domain.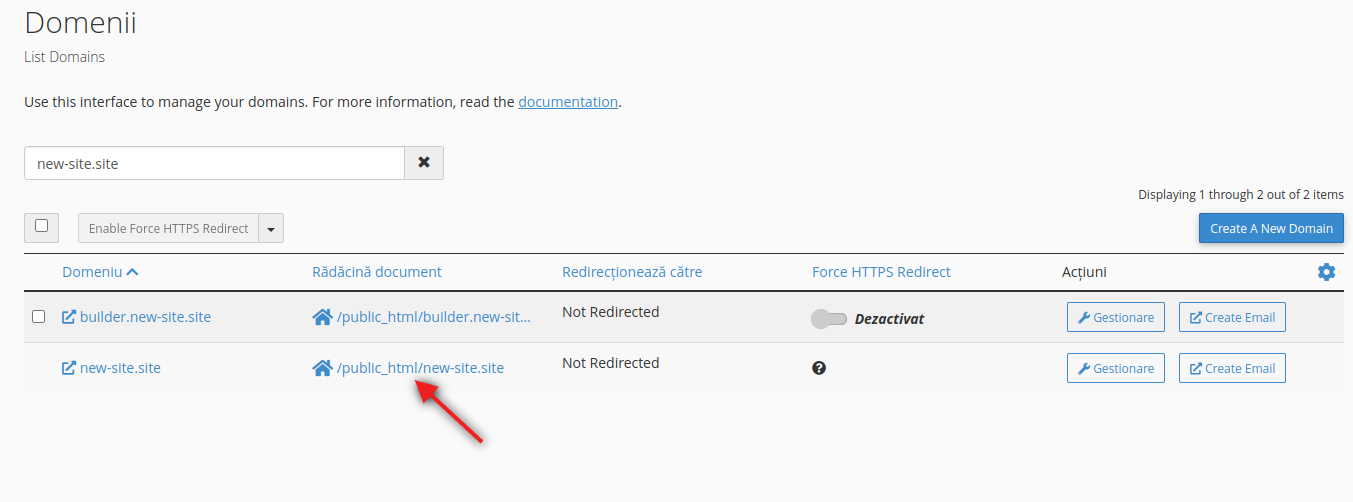
More on which folder belongs to which domain: where to upload the content of the site.
Step 2. Upload and unpack the files
- In File Manager, inside the domain's folder, click Upload on the top bar.
- Click Select File, choose the archive on your computer and wait until the progress bar reaches 100%.
- Click the link Go Back to followed by the folder path to return to File Manager.
- Select the archive and click Extract in the top right corner, then confirm.
- Check where the files ended up. If the archive held a folder, the site now sits one level too deep (for example
public_html/site/). Open that folder, select everything, use Move to bring it up intopublic_html, then delete the empty folder and the archive.
Files such as .htaccess are hidden until you click Settings and tick Show Hidden Files (dotfiles). Make sure they were uploaded: without .htaccess the inner pages of most CMS answer with error 404. If a large archive keeps failing in the browser, upload the files with FileZilla instead.
Step 3. Create the database and its user
- Go back to the cPanel home page and, in the Databases section, open MySQL Databases. The MySQL Database Wizard in the same section does the same work as a guided sequence.
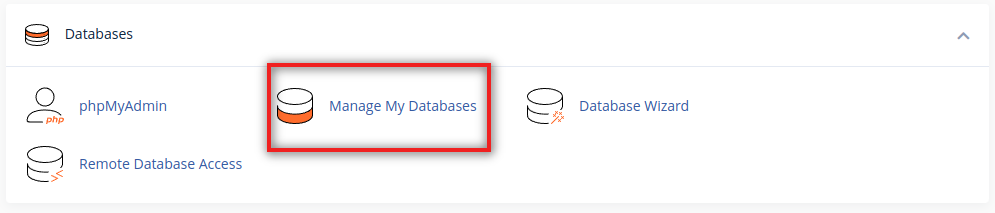
- Under Create New Database type a name and click Create Database. cPanel adds your account name in front, so
shopbecomes, for example,user_shop. Write down the full name. - Under MySQL Users, in Add New User, enter a user name and a strong password. The Password Generator button creates one; copy it before you continue. Click Create User.
- Under Add User To Database choose the new user and the new database, then click Add.
- On the privileges page tick ALL PRIVILEGES and click Make Changes.
The same steps, in more detail: creating a MySQL database and its access details.
Step 4. Import the database
- In the Databases section open phpMyAdmin. It opens in a new tab.
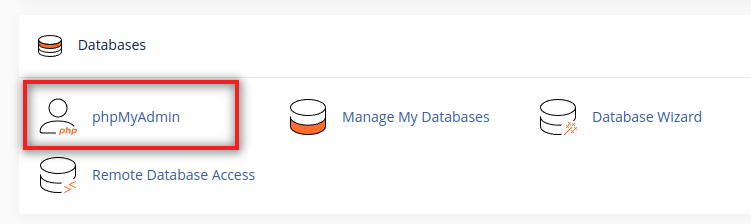
- Click your database in the list on the left, then open the Import tab.
- Click Choose File, pick the export file, scroll down and press Import (Go in older versions). Wait for the green success message.
If phpMyAdmin reports that the file is too large or the import stops halfway, compress the file and try again, or open a ticket and we will advise. Importing over SSH and the usual import errors (CREATE DATABASE, collation, DEFINER, broken characters) are covered in exporting, importing and moving a MySQL database.
Step 5. Connect the site to the new database
Open the configuration file in File Manager with Edit and write the new details: the full database name, the full user name, the password and the server localhost. In WordPress the lines look like this:
define( 'DB_NAME', 'user_shop' );
define( 'DB_USER', 'user_shopuser' );
define( 'DB_PASSWORD', 'the password you created' );
define( 'DB_HOST', 'localhost' );
If the site moves to a different domain at the same time, also change the site address in its settings (in WordPress, the siteurl and home values). Where other platforms keep these details: MySQL access details.
Testing and pointing the domain to TopHost
These steps are the same whoever moved the site.
- Check the copy before DNS. Open the site on our server through the hosts file on your computer. Go through the home page, a few inner pages, the admin login and any form.
- Change the nameservers to
ns4.tophost.mdandns5.tophost.md. The steps for .MD and international domains are in changing the nameservers. If you relied on special DNS records, recreate them in the TopHost DNS zone. - If your DNS stays with another service, for example Cloudflare, you do not change nameservers. Instead, update the domain's A record to the IP address of the TopHost server. Lower the record's TTL a day earlier so the change takes effect faster.
- The free SSL certificate is issued automatically once the domain points to us, as explained in the AutoSSL article.
Good to know
Will the website go down?
No. Until DNS is changed, visitors are still served by the old server. Only changes made on the old site after copying has started will be missing on the new one.
Does the domain have to move too?
No. It can stay with its current registrar; you only change the nameservers. If you want to bring it to TopHost, that is a separate step: Domain transfers.
What about email?
If the old host runs cPanel, mailboxes usually come across with the website. Without cPanel, messages can only be moved by hand, which is harder, and we will tell you in advance what is possible.
Frequent mistakes
- A list of files or a placeholder page instead of the site: the files are in a subfolder or in another domain's folder, or an old
index.htmlis still there. - "Error establishing a database connection": the configuration file has the short name instead of the full one with the prefix, the password is wrong, or the user was not added to the database.
- Blank page or error 500: often the site needs another PHP version; change it as shown in PHP version selection.
- "Permission denied" or files that cannot be changed: see the article on file permissions; folders normally have 755 and files 644.
- Support cannot copy the site: two-factor authentication is still on at the old host, or the access details sent are no longer valid.
Afterwards: change every password you shared with us (cPanel, FTP, database) at the old host, and keep the old hosting until you have checked everything.
